What is Hama Minecraft 3D? A Complete Guide is your ultimate guide to bringing the pixelated world of Minecraft to life with colorful, intricate creations using Hama beads. Forget about just playing the game – this is about crafting your own Minecraft adventures, one bead at a time.
From understanding the basics of Hama bead selection and tool usage to mastering advanced techniques and designing complex structures, this guide will equip you with everything you need to become a Minecraft 3D master. Get ready to unleash your creativity and transform your love for Minecraft into tangible, eye-catching masterpieces.
Introduction to Hama Minecraft 3D

Hama Minecraft 3D is a creative and engaging activity that combines the popular video game Minecraft with the classic craft of Hama beads. This unique combination allows fans of both worlds to build and create their own Minecraft structures, characters, and landscapes in a tangible and colorful way.
Hama Minecraft 3D offers a fun and interactive way to bring the digital world of Minecraft into the physical realm. It’s a great activity for children and adults alike, fostering creativity, spatial reasoning, and fine motor skills.
History and Origins of Hama Minecraft 3D
Hama beads, also known as Perler beads, have been a popular craft for decades, offering a simple yet versatile way to create colorful designs. Minecraft, on the other hand, has become a global phenomenon since its release in 2011, captivating players with its open-world sandbox gameplay and endless possibilities for building and exploration.The concept of Hama Minecraft 3D emerged as a natural fusion of these two popular elements.
Early examples of Hama Minecraft 3D creations were shared online, inspiring others to join the trend. The popularity of the activity grew rapidly, leading to the creation of numerous tutorials, patterns, and communities dedicated to this unique craft.
Understanding the Materials and Tools
To embark on your Hama Minecraft 3D journey, you’ll need a few essential materials and tools. These components will help you create intricate and detailed Minecraft models, bringing your digital world to life in a tangible way.
Types of Hama Beads, What is Hama Minecraft 3D? A Complete Guide
Hama beads are the foundation of your Minecraft 3D creations. Understanding the different types available will allow you to select the perfect beads for your projects.
- Mini Beads:These small beads are ideal for creating detailed and intricate designs. They offer greater precision and allow for more complex patterns. Due to their smaller size, they require a higher level of dexterity and patience.
- Maxi Beads:These larger beads are perfect for beginners or those seeking a quicker and easier experience. They are easier to handle and create larger, bolder designs. Maxi beads are less intricate than mini beads, making them suitable for simpler projects.
- Transparent Beads:These beads are translucent, allowing light to pass through them. They add a unique visual element to your creations, creating a shimmering effect. Transparent beads are often used for special effects, such as water or glass.
- Metallic Beads:These beads have a metallic finish, adding a touch of glamour to your creations. They come in various colors and can be used to create accents, such as armor or weapons.
- Fluorescent Beads:These beads glow in the dark, adding a magical element to your creations. They are perfect for adding special effects or creating night-time scenes.
Necessary Tools
Beyond the beads, you’ll need a few essential tools to facilitate the creation process.
- Pegboard:The pegboard serves as the base for your designs. It is a gridded surface with pegs that hold the beads in place. Pegboards come in various sizes, so choose one that suits your project.
- Iron:The iron is used to fuse the beads together, creating a solid and durable structure. It is important to use a low heat setting to prevent the beads from melting.
- Tongs:Tongs are used to handle the hot pegboard safely during the fusing process. They provide a secure grip and protect your hands from burns.
- Tweezers:Tweezers are helpful for placing beads precisely on the pegboard, especially when working with small or delicate beads. They allow for fine motor control and minimize the risk of dropping beads.
- Scissors:Scissors are used to trim any excess bead string or to cut out shapes from your designs.
Safety Precautions
Working with Hama beads and tools requires some basic safety precautions.
- Adult Supervision:Children should always be supervised by an adult when working with Hama beads and irons.
- Heat Safety:Always use a low heat setting on your iron and handle the hot pegboard with caution. Never leave the iron unattended when it is plugged in.
- Sharp Tools:Handle scissors and tweezers with care, and keep them out of reach of young children.
- Proper Ventilation:Ensure proper ventilation when fusing the beads, as the process releases a small amount of fumes.
Designing and Creating Minecraft 3D Models

Designing and creating Minecraft 3D models using Hama beads is a fun and creative way to bring your favorite in-game creations to life. This process involves planning your model, selecting the right colors, and carefully assembling the beads.
Planning Your Model
Before you start creating, it’s important to plan your model. This includes determining the size, shape, and details you want to include. You can use reference images from the game or create your own designs. It’s helpful to draw a simple Artikel or sketch of your model to visualize the final product.
Creating the Model
Once you have a plan, you can start creating your model. Here are some techniques you can use:
Using Grid Paper
Using grid paper can be a helpful tool for planning your model. You can draw your design on the grid paper, and then use it as a guide when arranging the beads. This method is particularly helpful for complex models.
Creating Basic Shapes
Start by creating basic shapes, like cubes, spheres, and cylinders. These can be used as building blocks for more complex models. For example, a cube can be used to create a block of stone, while a sphere can be used to create a fireball.
Adding Details
Once you have the basic shapes, you can add details to your model. This can be done by using different colors of beads or by creating patterns. For example, you can use different colors of beads to create a brick wall or a patterned rug.
Using Multiple Layers
For more intricate models, you can use multiple layers of beads. This allows you to create more depth and detail. For example, you can create a layered model of a house with walls, a roof, and windows.
Tips and Tricks
Here are some tips and tricks to help you create realistic and visually appealing Minecraft 3D models:
Use a Variety of Colors
Using a variety of colors can help to add depth and realism to your models. Experiment with different color combinations to find what works best for you.
Use Different Bead Sizes
Using different bead sizes can also add detail and texture to your models. For example, you can use larger beads for the main body of a model and smaller beads for the details.
Use a Bead Board
A bead board is a helpful tool for creating Minecraft 3D models. It provides a flat surface to work on and helps to keep your beads organized.
Use a Tweezers
Tweezers can be helpful for placing small beads and for making precise movements.
Use a Light Source
Using a light source can help to highlight the details of your model and make it more visually appealing.
Building and Assembling Minecraft 3D Creations
Once you’ve designed your Minecraft 3D model, it’s time to bring it to life! This section delves into the step-by-step process of assembling your Hama Minecraft 3D creation, ensuring it’s sturdy and ready to showcase your Minecraft world.
Connecting and Securing Individual Beads
Connecting Hama beads involves a simple yet crucial technique. The beads are designed with small holes that allow them to interlock, creating a stable structure. To connect the beads, you’ll use a pegboard or a flat surface, and simply push the beads together.
The pegboard helps keep the beads in place while you’re connecting them.
Techniques for Building Stable and Durable Structures
Creating durable and stable structures is key to showcasing your Minecraft 3D creations. Here are some tips:
- Use a pegboard or a flat surface:This will provide a stable base for your creation and help you avoid accidental bumps or drops.
- Interlock the beads tightly:Ensure the beads are properly connected by pushing them together firmly.
- Use a pattern or design:A well-designed pattern will create a stronger and more visually appealing structure.
- Consider adding supports:For larger or more complex structures, you might need to add additional supports to ensure stability.
- Use a sealant:A sealant, such as a clear acrylic spray, can be applied to your finished creation to help protect it from dust and moisture, adding to its durability.
Creating Strong and Stable Structures
Here are some additional tips to consider when assembling your Minecraft 3D creations:
- Start with a base:Begin by building a solid base for your structure. This will provide a foundation for the rest of your creation.
- Work in sections:For larger creations, break the design into smaller sections. This makes the assembly process easier and less prone to errors.
- Use a variety of bead colors:Incorporating different colors can add depth and dimension to your Minecraft 3D models.
- Add details:Use small beads to create intricate details, such as windows, doors, or other elements that enhance the realism of your creation.
Exploring Advanced Techniques and Ideas
Now that you have a solid grasp of the fundamentals of Hama Minecraft 3D, it’s time to delve into some advanced techniques and ideas that will allow you to create truly unique and impressive creations. These techniques will push your creativity and allow you to bring your Minecraft visions to life with even greater detail and complexity.
Incorporating Light and Sound Effects
Adding light and sound effects to your Hama Minecraft 3D creations can elevate them from static displays to interactive experiences. This section discusses methods for incorporating light and sound effects into your Hama Minecraft 3D creations, offering practical tips and examples.
- LED Lighting: LED lights are a popular choice for adding light to Hama Minecraft 3D models. They are small, energy-efficient, and come in a variety of colors. You can use LED strip lights, individual LEDs, or even LED tea lights to illuminate your creations.
To incorporate LEDs, you can create small holes in your Hama bead designs and thread the LEDs through them.
For example, you could create a glowing portal by embedding LEDs within a Hama bead representation of the portal. You could also create a lava flow with LEDs that change color, or a glowing beacon by incorporating a small LED at its peak.
Remember to use a battery pack or a small power source to power the LEDs, ensuring the wiring is secure and properly insulated.
- Sound Effects: Sound effects can add another dimension to your Hama Minecraft 3D creations. You can use small speakers, sound modules, or even your smartphone to play sounds that correspond to your creations.
For example, you could create a sound-activated trapdoor that plays a sound when opened or a creeper that makes a hissing sound when triggered.
You could also create a jukebox that plays different songs depending on which buttons are pressed.
Want to dive into the world of Hama Minecraft 3D? It’s all about building with colorful beads, creating 3D masterpieces inspired by your favorite Minecraft creations. But before you get started, it’s essential to understand the features of 3D Minecraft PE, which is where this awesome guide comes in: Features of 3D Minecraft PE: Everything You Need to Know.
Once you’ve got a handle on the basics, you’ll be ready to unleash your inner Minecraft architect with Hama beads, bringing your virtual worlds to life in the real world!
To add sound effects, you can either integrate a small speaker directly into your creation or use a Bluetooth speaker that can be placed nearby. You can also create a hidden sound system by using a small sound module and a battery pack.
Remember to choose sound effects that are appropriate for your creation and to use them sparingly to avoid overwhelming the viewer.
Troubleshooting and Tips for Success
Building Minecraft 3D models with Hama beads can be a rewarding experience, but it’s not without its challenges. This section will guide you through common issues you might encounter and offer solutions to help you create stunning and durable creations.
Common Challenges
Understanding the common challenges associated with Hama bead projects can help you anticipate and overcome them effectively.
- Melting and Deforming:Overheating the beads can lead to melting and deformation. This is particularly relevant when using ironing techniques.
- Uneven Bead Placement:Inconsistent bead spacing can create gaps and affect the overall structure of your model. This is often due to improper bead arrangement or insufficient pressure during fusing.
- Fragility:Improper fusing can result in fragile structures that easily break or disintegrate. This can be caused by inadequate heat or insufficient pressure during the fusing process.
- Color Bleeding:Some Hama bead colors can bleed into others, especially when exposed to high heat. This can affect the vibrancy of your design and create unwanted color mixing.
- Difficult to Remove from Pegboard:Removing your creation from the pegboard can be tricky, especially with intricate designs. Improper fusing or a tight fit can make removal challenging.
Troubleshooting and Solutions
Identifying and addressing issues is crucial for successful Hama bead projects. Here are some practical solutions to common challenges:
- Melting and Deforming:Use a low heat setting on your iron, and avoid prolonged exposure to heat. Consider using a heat-resistant surface like parchment paper to prevent direct contact with the iron.
- Uneven Bead Placement:Carefully arrange your beads, ensuring they are tightly packed and evenly spaced. Use a ruler or a pegboard grid to help with alignment. Apply firm, even pressure while fusing to ensure all beads are properly bonded.
- Fragility:Use a heat-resistant surface and apply sufficient pressure during fusing. Consider using a heavier object to weigh down the design while it cools, further strengthening the structure.
- Color Bleeding:Choose colors that are known to be colorfast. Test a small sample of beads before using them in your project. Use a lower heat setting and avoid prolonged exposure to heat. For intricate designs, consider using a separate pegboard for each color section to prevent bleeding.
- Difficult to Remove from Pegboard:Ensure the beads are properly fused. Gently lift the design from the edges, working your way around the perimeter. If it’s still stuck, try using a thin tool like a butter knife or a credit card to carefully separate the design from the pegboard.
Expert Advice for Success
Following expert advice can significantly improve your Hama bead creations.
- Use High-Quality Beads:Choose beads from reputable brands that are known for their durability and colorfastness. High-quality beads will produce better results and last longer.
- Invest in a Good Iron:A quality iron with adjustable temperature settings is essential for achieving optimal results. Avoid using old or malfunctioning irons, as they can lead to inconsistent heat distribution and potentially damage your creations.
- Practice Patience:Hama bead projects can take time and patience. Don’t rush the process, and take breaks when needed. A well-planned and carefully executed project will yield the best results.
- Experiment with Techniques:There are various techniques for fusing Hama beads, such as using an iron, a heat gun, or even a microwave. Experiment with different methods to find what works best for you and your specific projects.
- Don’t Be Afraid to Experiment:Be creative and don’t be afraid to experiment with different colors, patterns, and designs. Try incorporating other materials, like string or wire, to create unique and personalized creations.
Inspiring Minecraft 3D Projects and Ideas: What Is Hama Minecraft 3D? A Complete Guide
The world of Minecraft is brimming with possibilities, offering endless inspiration for your Hama bead creations. From iconic characters to breathtaking environments, there’s a world of 3D models waiting to be brought to life. This section will explore some popular ideas and projects to ignite your imagination and guide you on your Hama Minecraft 3D journey.
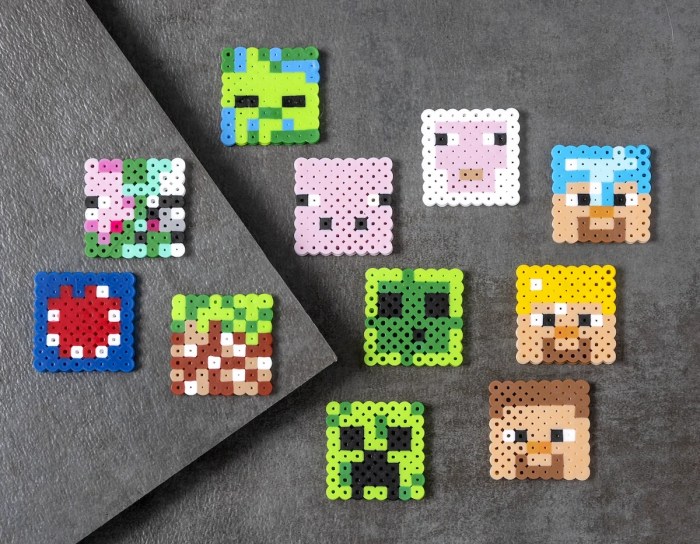
Popular Minecraft Characters
Minecraft characters are instantly recognizable and hold a special place in the hearts of many players. These characters are perfect for your Hama bead creations, offering a fun and challenging way to recreate your favorite in-game companions.
- Steve: The iconic protagonist of Minecraft, Steve is a must-have for any Hama bead collection. His simple design makes him easy to recreate, while the addition of his tools or weapons adds an extra layer of detail.
- Alex: The female counterpart to Steve, Alex is another popular choice for Hama bead projects. Her unique design and color palette make her stand out from the crowd.
- Creeper: The infamous green mob known for its explosive tendencies, the Creeper is a classic Minecraft character. Its distinctive blocky design makes it a fun and challenging project for Hama bead enthusiasts.
- Enderman: These tall, dark creatures are a formidable foe in Minecraft. Their slender bodies and signature purple eyes offer a unique challenge for Hama bead enthusiasts.
- Pig: The friendly and farmable pig is a popular choice for beginners. Its simple design makes it easy to create, while the addition of a saddle or a piglet adds an extra layer of detail.
- Zombie: These undead creatures are a common sight in Minecraft. Their decaying flesh and menacing eyes make them a perfect choice for a spooky Hama bead project.
- Skeleton: The skeletal remains of a fallen warrior, skeletons are a common sight in Minecraft. Their bony bodies and signature bow and arrow make them a unique and challenging project for Hama bead enthusiasts.
Minecraft Environments and Structures
Beyond individual characters, the world of Minecraft offers a wealth of inspiration for your Hama bead projects. From bustling cities to serene forests, the possibilities are endless.
| Environment/Structure | Description | Hama Bead Ideas |
|---|---|---|
| Village | A small community of houses, farms, and shops. | Create individual houses, a blacksmith shop, a church, or a well. |
| Castle | A grand and imposing structure, often with towers, walls, and a moat. | Create a small castle tower, a section of the castle wall, or a drawbridge. |
| Forest | A lush and verdant area filled with trees, flowers, and animals. | Create a towering oak tree, a small cluster of mushrooms, or a peaceful deer. |
| Desert | A barren and arid landscape with sand dunes, cacti, and temples. | Create a sand dune, a towering cactus, or a pyramid temple. |
| Nether | A fiery and dangerous dimension filled with lava, magma cubes, and ghasts. | Create a lava pool, a magma cube, or a menacing ghast. |
Online Resources and Communities
The online world is a treasure trove of inspiration and resources for Hama bead enthusiasts. Dedicated communities and websites offer tutorials, inspiration, and a place to share your creations with fellow enthusiasts.
- Minecraft Forums: The official Minecraft forums are a great place to find discussions and inspiration for Hama bead projects. Many users share their creations and offer advice on techniques and materials.
- Reddit: The popular online forum Reddit has numerous communities dedicated to Hama bead crafts, including r/hamabeads and r/Minecraft. These communities are a great place to find inspiration, share your creations, and ask for help.
- Pinterest: The visual bookmarking platform Pinterest is a treasure trove of inspiration for Hama bead projects. You can find countless images of Minecraft creations, along with tutorials and tips.
- YouTube: The video-sharing platform YouTube is home to a wealth of tutorials and inspiration for Hama bead crafts. You can find videos on everything from basic techniques to advanced projects.
Final Conclusion
So, are you ready to dive into the world of Hama Minecraft 3D? Whether you’re a seasoned Minecraft player or a curious beginner, this guide has something for everyone. With a little patience, creativity, and the right tools, you’ll be amazed at what you can create.
Get ready to unleash your inner Minecraft builder and transform your imagination into stunning 3D reality!